CloudFlarePage静态部署
前言
CloudFlare方案适用于站点访问量大,而文章更新不频繁的用户。
目前是我个人在用的方案。
参考haixin的文章《NotionNext建站-cloudflare版》,这里做了优化
部署效果预览


CloudFlare版本是静态导出的,不支持实时更新文章,每次更改Notion内容后请手动部署站点。若需要实时动态更新请使用Vercel\Netlify\Zeabur\VPS部署方案。
CloudFlare部署方案,以及其他所有使用 静态导出的方案,默认都不支持NotionNext自带的搜索功能,必须集成Algolia插件才能实现全文搜索。
详情参考Algolia全文搜索插件获取帮助:


开始
访问CloudFlarePage


创建项目
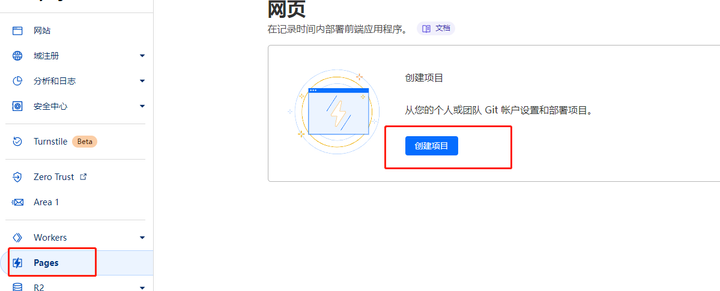
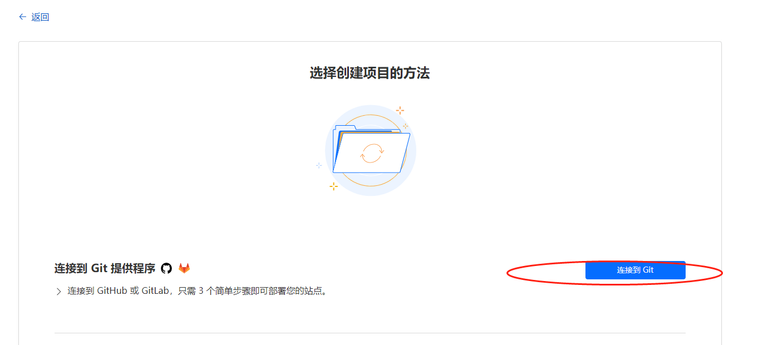
注意,2026年新版的Cloudflare 默认引导部署Workers,但是NotionNext目前的代码不支持Workers动态。 暂时还是选择使用Pages静态部署:

- 直接连接git
- 导入项目

- 选择分支


环境变量
配置效果如下

配置说明,新版本的NotionNext中,NODE_VERSION要更新为
20版本。变量名称 | 值 |
NODE_VERSION | 20 |
VERCEL_ENV | production |
NOTION_PAGE_ID | {您的Notion页面id} |
最后点击保存并部署即可。
完成部署
页面中心会显示您的访问域名

FAQ
部署失败?如果你的构建日志中出现:
可能是Cloudflare升级环境导致不兼容,解决方法:降级为旧版构建环境,然后点击重试


需要帮助?
如果你的部署异常,没有出现一个绿色的勾,通常是代码修改异常或者配置错误导致,点击右侧的查看详情,获取详细的部署日志:

在构建日志这一栏可以看到所有详细的错误信息,根据错误日志进行排查问题,如果无法自行排查,可以将日志复制或截图,寻求他人帮助。

CloudFlarePage如何绑定自定义域名?
项目主页找到
自定义域,找到下方设置自定义域
填写域名并继续

按照要求在域名服务商后台配置一个CNAME转发

- CNAME转发示例

- 点击下方的激活域,由于我使用的域名商本身就是cloudflare,故此步骤只需几秒即可完成验证。

Hooks 触发部署
CloudFlare 支持和Vercel 类似的hooks 功能,后台生成一个调用地址,即可触发站点重新部署,用于更新文件和配置等。
在项目的设置页面,构建栏目下的部署挂钩。点击加号➕新增一个hooks即可

创建挂钩时,要指定你部署的github代码分支,以及随意起一个挂钩名称;


创建后会生成一个webhook链接,点击复制链接保存使用。
需要注意,CloudFlare的hook 和 Vercel 不一样:
- Vercel webhook 👉 GET 也行(在浏览器地址栏输入Webhook网址即可 简单触发)
- Cloudflare Deploy Hook 👉 只允许 POST(更安全)
浏览器访问会提示
method_not_allowed
👉 防止被随便浏览器点一下就触发部署
Windows/Mac/Linux可以用 终端命令行输入以下命令触发
当页面显示如下内容,说明已经触发了重新部署

Prev
Vercel快速重新部署项目
Next
Netlify云函数部署
Loading...
